
Septic systems are designed to last for decades, but issues can arise that require repair. From clogs to leaks, knowing how to approach repairs can save you time and money. Here’s a simple septic system repair guide to help you understand the process and take the right steps.
Step 1: Identify the Problem
The first step in repairing your septic system is to figure out what’s wrong. Common signs of issues include:
- Slow Drains: Wastewater takes longer to drain from sinks, tubs, or toilets.
- Foul Odors: Sewage smells inside or outside your home.
- Standing Water: Puddles or soggy soil near the tank or drain field.
- Backups: Wastewater backing up into your home.
- Lush Grass: Overly green or wet areas above the drain field.
Step 2: Call a Professional
While some minor issues can be handled by homeowners, most septic system repairs require a licensed professional.
- Why It’s Important: Septic systems are complex, and improper repairs can worsen the problem or violate local regulations.
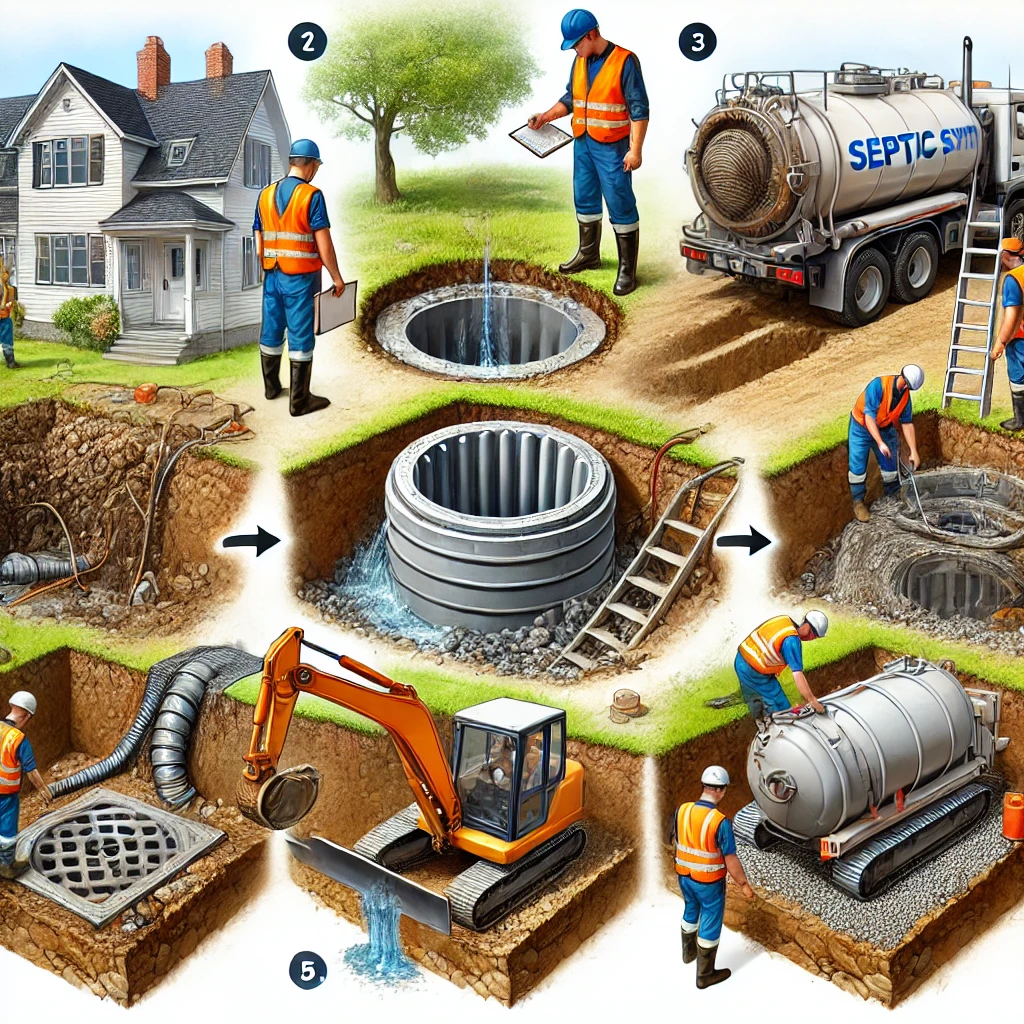
Step 3: Schedule an Inspection
A professional inspection is key to diagnosing the issue accurately. The inspector will:
- Check the septic tank for leaks, clogs, or overfilling.
- Inspect the pipes and baffles for damage.
- Evaluate the condition of the drain field.
Step 4: Pump the Tank (If Needed)
If the tank is full, pumping is often the first step in repairs.
- What It Does: Removes sludge and scum, allowing the inspector to see the tank’s condition more clearly.
Step 5: Address Specific Repairs
1. Clogged Pipes or Outlets
- Symptoms: Slow drains or backups.
- Solution:
- Use professional-grade equipment to clear the blockage.
- Avoid using chemical drain cleaners, as they can damage the tank’s bacteria.
2. Leaking Tank
- Symptoms: Foul odors, standing water, or sinking soil around the tank.
- Solution:
- Small cracks can sometimes be sealed with specialized epoxy or concrete.
- Severe leaks may require tank replacement.
3. Damaged Baffles
- Symptoms: Solids escaping the tank and clogging the drain field.
- Solution:
- Replace broken or missing baffles to restore proper flow.
4. Drain Field Problems
- Symptoms: Soggy soil, standing water, or overly lush grass.
- Solution:
- Aerate the soil or install additional drain lines to improve absorption.
- In severe cases, replace the drain field.
5. Root Intrusion
- Symptoms: Slow drains or backups caused by tree roots blocking pipes.
- Solution:
- Use a root cutter to remove blockages.
- Install root barriers to prevent future intrusion.
Step 6: Test the System
Once repairs are complete, the professional will test the system to ensure everything is functioning properly.
- What They’ll Check:
- Proper flow of wastewater.
- Absorption in the drain field.
- No leaks or clogs in the system.
Step 7: Prevent Future Issues
After repairs, follow these tips to keep your septic system in good shape:
- Pump Regularly: Schedule pumping every 3-5 years.
- Use Water Wisely: Conserve water to avoid overloading the system.
- Flush Smart: Only flush toilet paper and human waste. Avoid wipes, grease, and chemicals.
- Protect the Drain Field: Keep heavy vehicles and trees away from the area.
When to Consider System Replacement
If your septic system has multiple recurring issues or is over 20-40 years old, replacement may be more cost-effective than repairs. A professional can help you determine if it’s time for a new system.
The Bottom Line
This septic system repair guide highlights the importance of identifying problems early and working with professionals to resolve them. Regular maintenance and proactive care will save you money and extend the life of your system.
Stay ahead of problems, and your septic system will thank you. Simple, right?